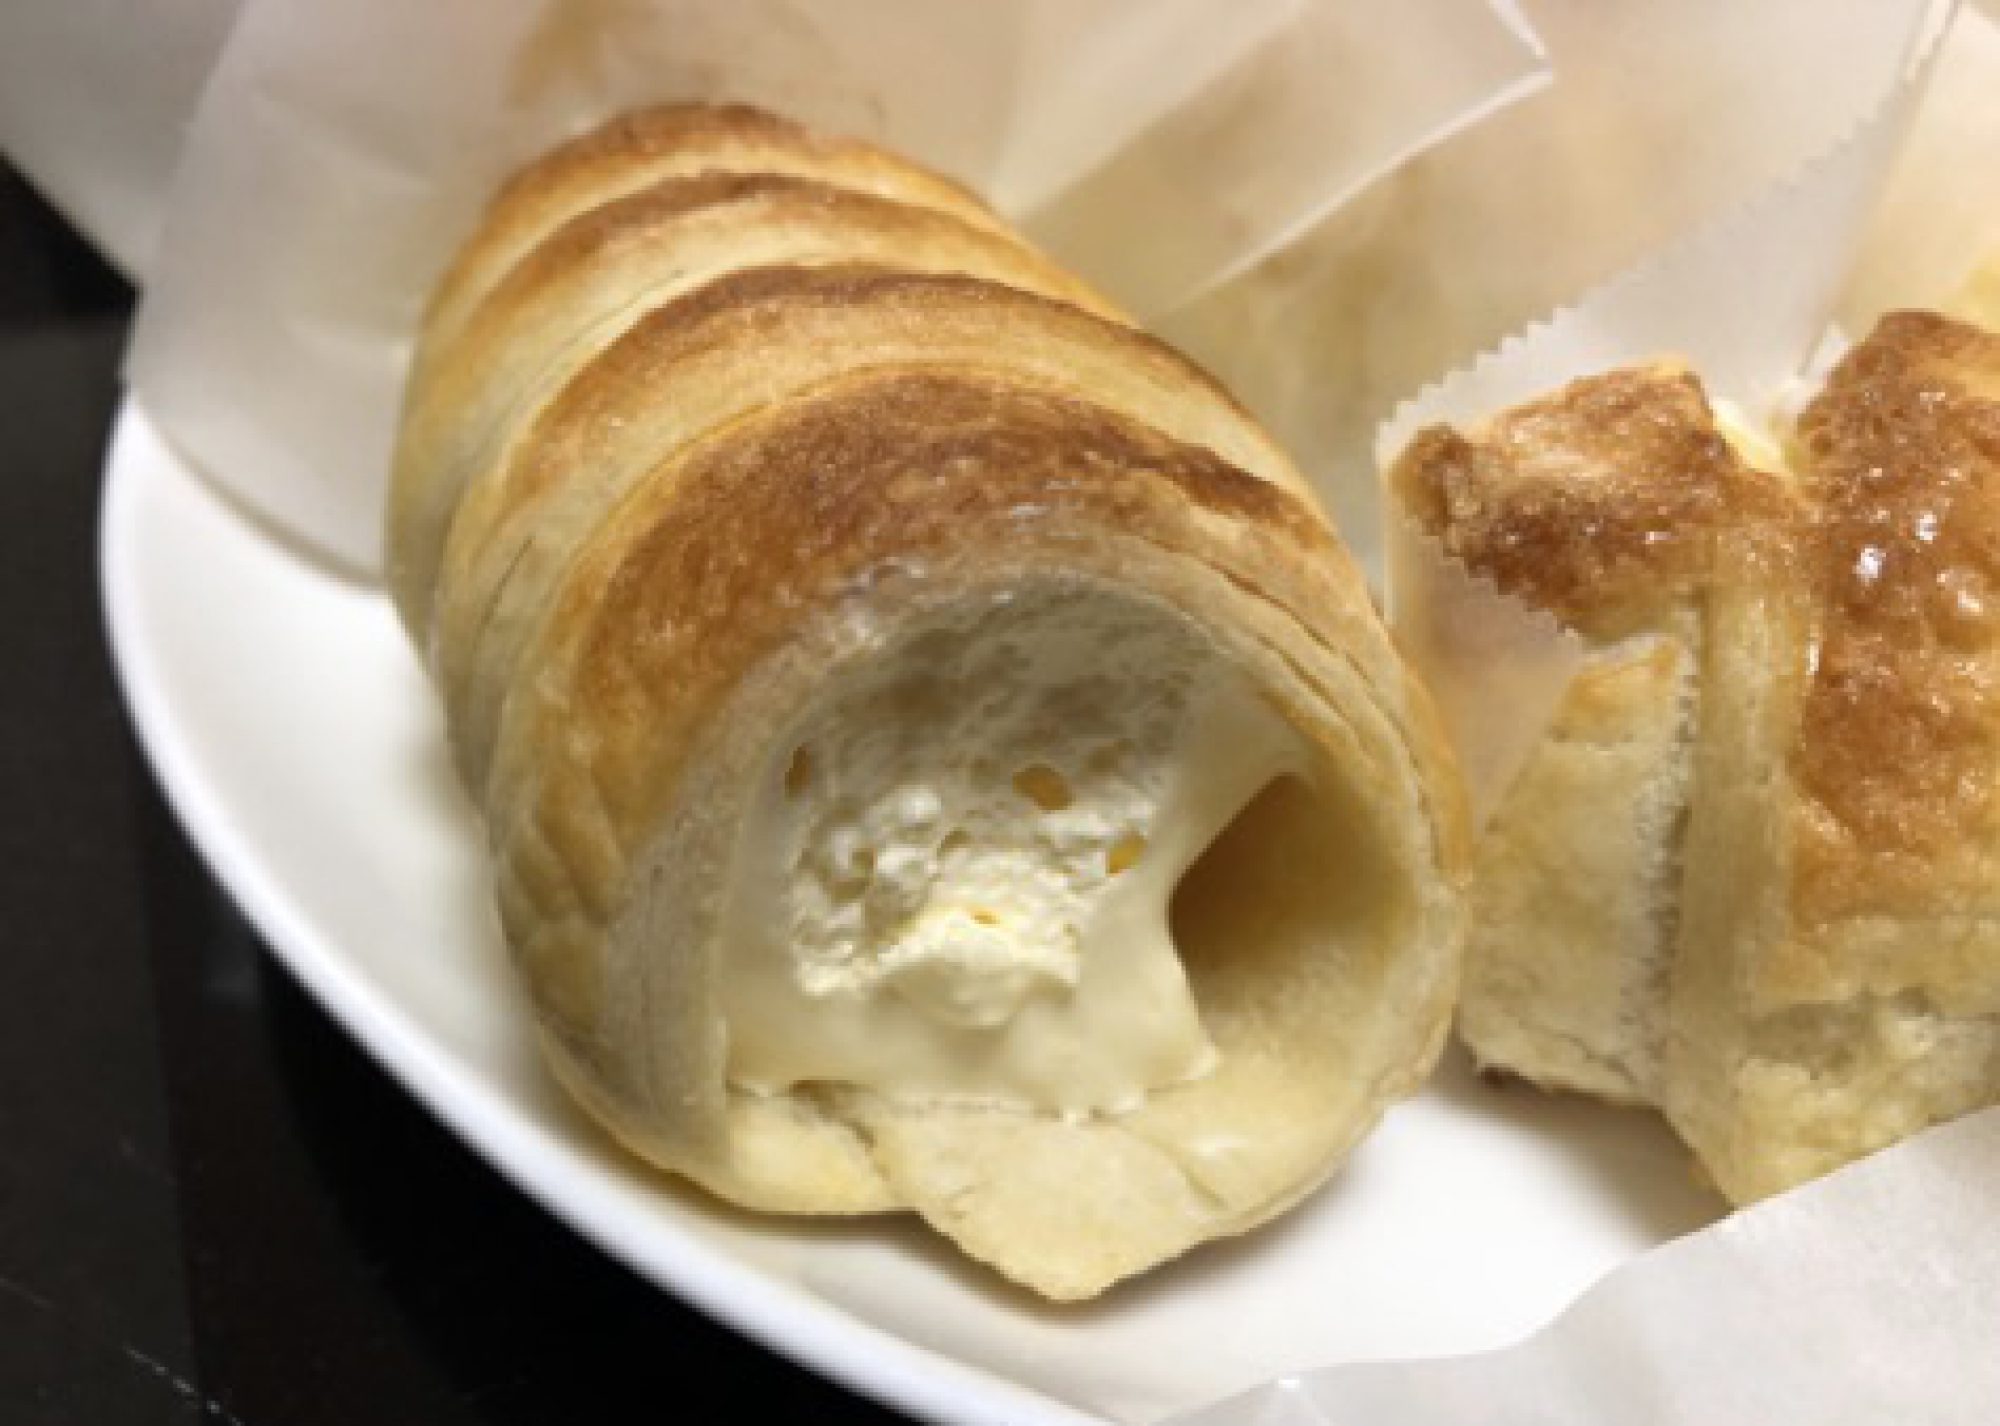
レモンカード (Lemon Curd) を作る: Bain-marieを用いることで加熱を止めるタイミングを誰でも簡単に理解できる超簡単レシピを考えてみた。十分な加熱/途中でのアレンジが可能なレシピ。

レモンカード : Lemon Curd

レモンカードは19世紀後半にイギリスでジャムの代替品として生まれた伝統的なデザートスプレッドです。カード(curd)の意味は”凝乳”ですが、どうやらペースト状に固めることを意味しているようです。フレッシュレモンの皮、果汁を使用しますので防腐剤を含まない国産レモンを店頭で簡単に手に入れることができる今が旬になります。フルーツカード(Fruits card)として、主に柑橘類(レモン、オレンジ、ライムなど)を材料にケーキやタルト、パンナコッタなどにも合わせることができます。レモンの酸味が強く出ますので、初夏に向かう今こそ爽快感あふれるフィリング、トッピングとしてぜひ使いたいアイテムです。

Ingredients: 材料および配合組成

最初から最後までBain-marieで作成します。これは鍋底で焼き進みによるスクランブルエッグのような塊の形成を防ぐのと、途中で何かアレンジを思いついた際にやりやすいようにするためです。卵を使用しますので70~75℃まで混合液の温度は上昇させます。

IngredientsEstimated Volume 450 gram (net)
Superfine Sugar150 gram
Whole Egg (L)2 ea. (120 gram)
Egg Yolk2 ea. (40 gram)
Cornstarch (or Rice Powder)15 gram
Fresh Lemon Juice160 gram
Lemon Zest1 ea.
Butter (salted)30 gram
Lemon Curd Recipe: A large heat-durable bowl is supposed to be used,

Instructions; 調理法

まずレモン一個分のゼストを作ります。頻回にゼストを作る機会があるのであればゼスターを使用するのがいいですが、メッシュストレイナーの網目が少し大きめの場合はピーラーで黄色いところだけを剥いで、網目より少し大きめに刻んでおいた方が最後に回収するとき楽です。次にフレッシュレモン(防腐剤やワックス処理されていない国産レモン)を2~3個絞ってレモン果汁を160グラム作成します。
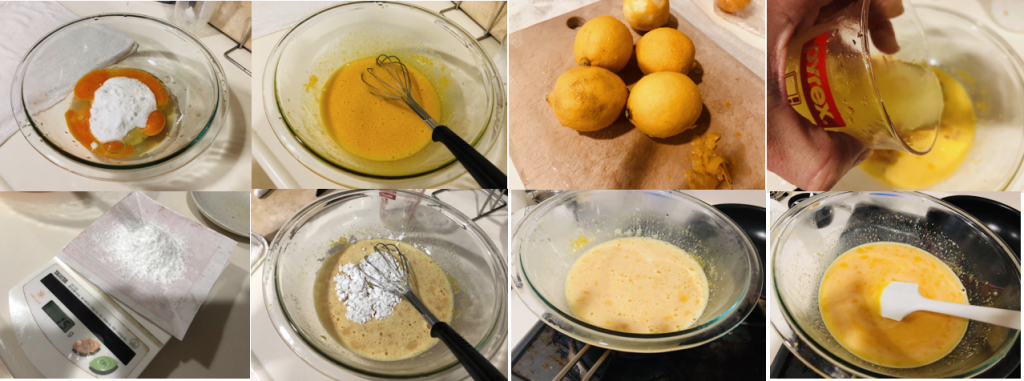
①大型耐熱ボウルに、全卵2個と卵黄2個、上白糖を150グラムいれてホイッパーで混ぜます。耐熱ボウルを沸騰させたソースパンの上に置き、すべての工程が終了するまでBain-marieで通します。
②レモンジュース160グラムとゼスト1個分を投入しスパチュラでゆっくりと混ぜます。
③コーンスターチ15グラムを投入し、混ぜます。
レモンカードの調理法
How to cook : Beforehand, prepare 1 lemon zest and 160 gram fresh lemon juice with no antiseptic agent. It takes about 3 fresh lemon of the medium size. All procedures as bellow mentioned, get through the double boiler method. ① Place 2 whole eggs and 2 egg yolks, 150 gram powdered superfine sugar in a large heat-durable bowl. Whisk gently over simmering water in a saucepan (Bain-marie) with a balloon whipper until sugar is completely dissolved. ② Pour 160 gram fresh lemon juice and 1 lemon zest and mix well. ③ Add 15 gram cornstarch and whisk until well incorporated. ④ Cook the egg mixture with stirring constantly. Simmer the mixture up over 70C. It usually takes about 10 to 15 minutes. The mixture will get thick around that temperature.


④ボウルの下面でスクランブルエッグを作らないように常にスパチュラで混ぜながら、70℃以上(75℃が理想)まで温度を上げます。温度が上昇するまで10~15分くらいかかりますが70℃を超えたくらいのところで粘度が上昇してしまうことがあります。70℃以上に達していれば保存に関しては、衛生面ではクリア出来ていると思います(ババロア作成と同じ要領です)。
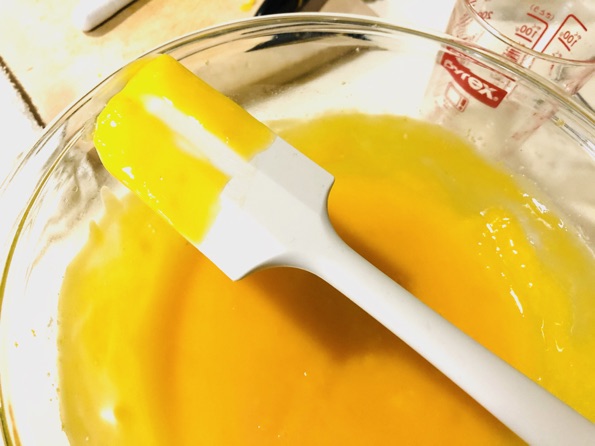
⑤粘度が上がって、スパチュラに指でくっきりと線が引けるようになれば濃縮終了です。
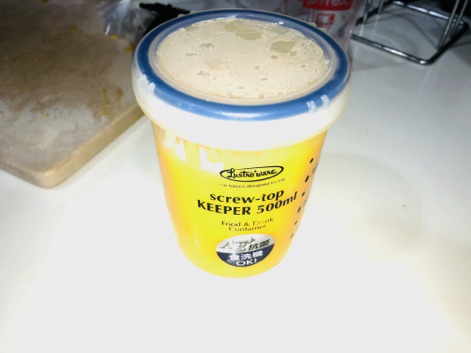
⑥火を切り、バター30グラム(キューブ状にカットして)を投入しスパチュラで混ぜて完全に溶け込ませます。これでレモンカードは完成です。最後にメッシュストレイナーを通してレモンの皮や塊を濾して他の保存容器に移して冷蔵庫に保管します。

レモンカードの過熱を止めるタイミング
When is the time of removing from heat?:
⑤ When a line drawn with the finger has got clear on the surface of the spatula, it’s just the time to remove from heat. ⑥ After removing from heat, dump 30 gram butter (cubed) to make it completely dissolved with stirring by the spatula. ⑥Transfer the lemon curd through the mesh strainer into a sterilized cup and keep it cool in a fridge.

完成したレモンカードは最大2週間くらいまで冷蔵庫で保存できるといわれていますがなるべく1週間以内に使い切るようにしています。
レモンカードの保存方法

Apple Cake(アップルケーキ)を作る

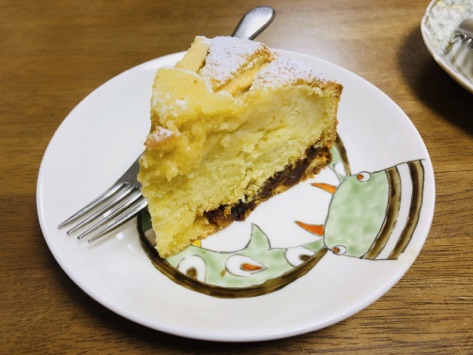
アップルケーキ断面

Apple Cake with Apple Caramel Flake Filling を作る。

年末に小ぶりのリンゴを沢山頂きましたので、これを用いてリンゴのスポンジケーキを焼いてみました。甘さ控えめですので、下層にキャラメルフレーク状にしたリンゴを敷いてアクセントをつけてみました。

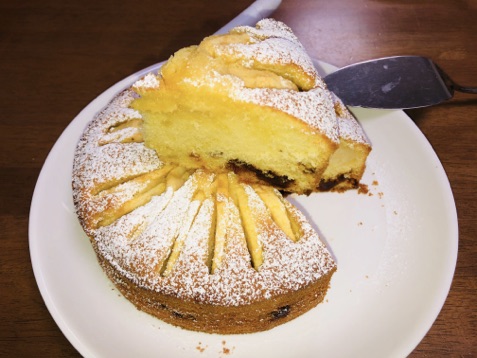
アップルケーキ
アップルケーキ:apple cake with apple caramel flake

材料/組成は下記の通りです。材料はトップバリュー製品を基本にいつものお馴染みの素材を使用しています。

IngredientsAmount needed
For Apple Caramel Flake
Apple (diced)250gram
Salted Butter70gram
Cake Syrup90gram
Heavy Cream(40% fat)100gram
For Sponge CakeAmount for φ18cm cake pan
Blend Butter(salted)85gram Butter & 95gram Margarine
Superfine Sugar105gram
Whole egg (M)3
Vanilla Oilany you want
Cake Flour170gram
Salt2gram
Baking Powder3.5gram
For Apple Filling
Apple(sliced)80gram
For frosting
Powdered Sugarany you want

レシピ(Recipe)

Apple Caramel Flake のレシピ

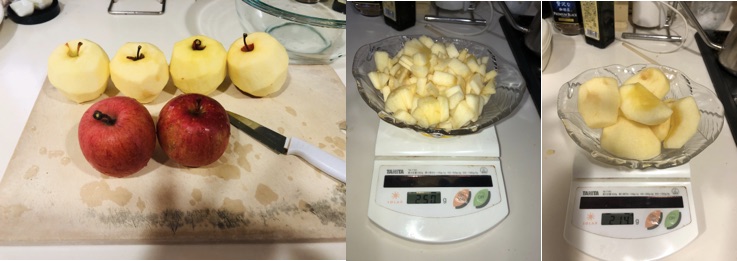
①リンゴの皮をむき、250gramをフレーク用に、200gramをスライス用に分けます(スライス用のリンゴは実際には80gramしか使いませんでした)。
②バターをソースパンに投入し、中火で沸騰させます。

リンゴ
Peel 4apples, and divide them into the 250gram diced apple and the 214gram sliced apple. Place butter into a saucepan over medium-high heat and bring it to a boil.

③沸騰したところでフレーク用にダイスしたリンゴを投入します。
④リンゴにバター色がついて柔らかくなるまでスパチュラでかき混ぜます。
⑤粘稠になってきたところで生クリームを100gram入れます(100gram以上入れると濃厚な味になるかもしれませんが濃縮には大分時間がかかります)。このとき泡立つ様にクリームが湧き上がって来ることがあるので火傷に注意が必要です。深さのあるソースパンを使用する方が安全です。

🍎調理課程01
When the butter boiled, dump the diced apple into the saucepan. Cook it until well incorporated.Then apply 90gram cake syrup and stir evenly.
🍎調理過程02
When the syrup gets thick, pour 100gram heavy cream. Be cautious not to touch the bubbles pop up. Stir evenly and remove from heat before the apple gets too dark. Transfer the apple flakes into a small bowl, chill it at room temperature.

⑥煮詰まってリンゴが柔らかいグミ状になったら加熱を中止、分離した透明の液体成分を捨てます。そのまま室温で冷やすか、小容器に移して冷まします。

Sponge Cakeのレシピ

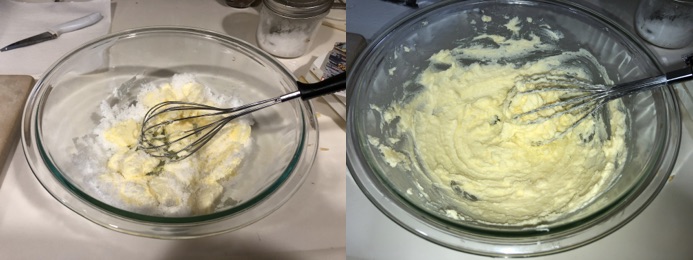
①マーガリンとバターを大型耐熱ボウルに入れてクリーム状になるまでフラワーホイッパーで混ぜます。

生地01
Place butter and margarine, sugar in a large bowl. Whisk it until it gets soft and creamy. Using blend butter makes it easy to combine sugar and butter.

②全卵を3個用意し、1個投入したら電動ホイッパーで均一になるまで混ぜます。この工程をを3回行います。混ぜ終わった時点では、生地は分離していますが後で小麦粉が入るので心配無用です。

生地02
Add whole eggs one by one, and electric-whisk evenly. Although the batter has not well incorporated , no need to worry.

③薄力粉を篩い、電動ホイッパーでクリーム状で粘稠(firm stage)になるまで混ぜます。生リンゴを後で投入して焼くと水分が出てきますのでその分を見越してスポンジケーキの生地は水分控えめの配合組成にしてあります。
④ケーキパン(springform)の内側にクッキングペーペーを貼り付け、底から1cm位くらいまで生地を注ぎます。
⑤アップルフレークを均一になる様に適当に敷きます。
⑥残りの生地を全て注ぎます。
⑦リンゴを5mm厚位にスライスして、車軸状に生地内に埋め込みます。

生地03
Preheat the oven up to 170C and line a parchment paper inside a cake pan. Sieve cake flour and electric-whisk until well incorporated. When the batter gets creamy and firm, pour it into the cake pan. Pouring up to 1cm depth, place the apple caramel flake evenly. Then pour the leftover of the batter, place the apple slices like a wheel. Oven-bake at 170C for 55 minutes.

⑧170℃で55分焼き上げます。中心部が火に通り難いですので爪楊枝て刺してみて液体の生地が付いてこない状態まで焼きあがっていることを確認します。
⑨オーブンから取り出してクーリングラックの上に置いて常温で冷まします。
⑩モールドを外して、パウダーシュガーを表面に適当に篩います。6時間ほど冷蔵庫で冷やすとさらにおいしくなります。

🍎ケーキ完成
Remove the cake from the oven. let it cool at room temperature on a cooling rack.. Then unmold and place the cake on a dish. Sprinkle powdered sugar and chill the cake in a fridge for 6 hours or more until served..

スポンジケーキの焼きあがりの状態を確認する方法

bounce back の確認:中央を指で押してケーキが弾性で指を押し戻すかどうか?
竹串による確認:爪楊枝や竹串、または直接温度計を中心から垂直に底までに刺して引き抜いた際に液体成分が付いて来ないかどうか?中心温度は最低80℃以上に到達しているかどうか(これは衛生管理上の問題確認です)。
上記を2つともクリアしていれば完了です。表面の焼進みが先行する場合は、アルミホイルを1枚上蓋として乗せて焦げ付きを防ぎながら①、②をクリアします。