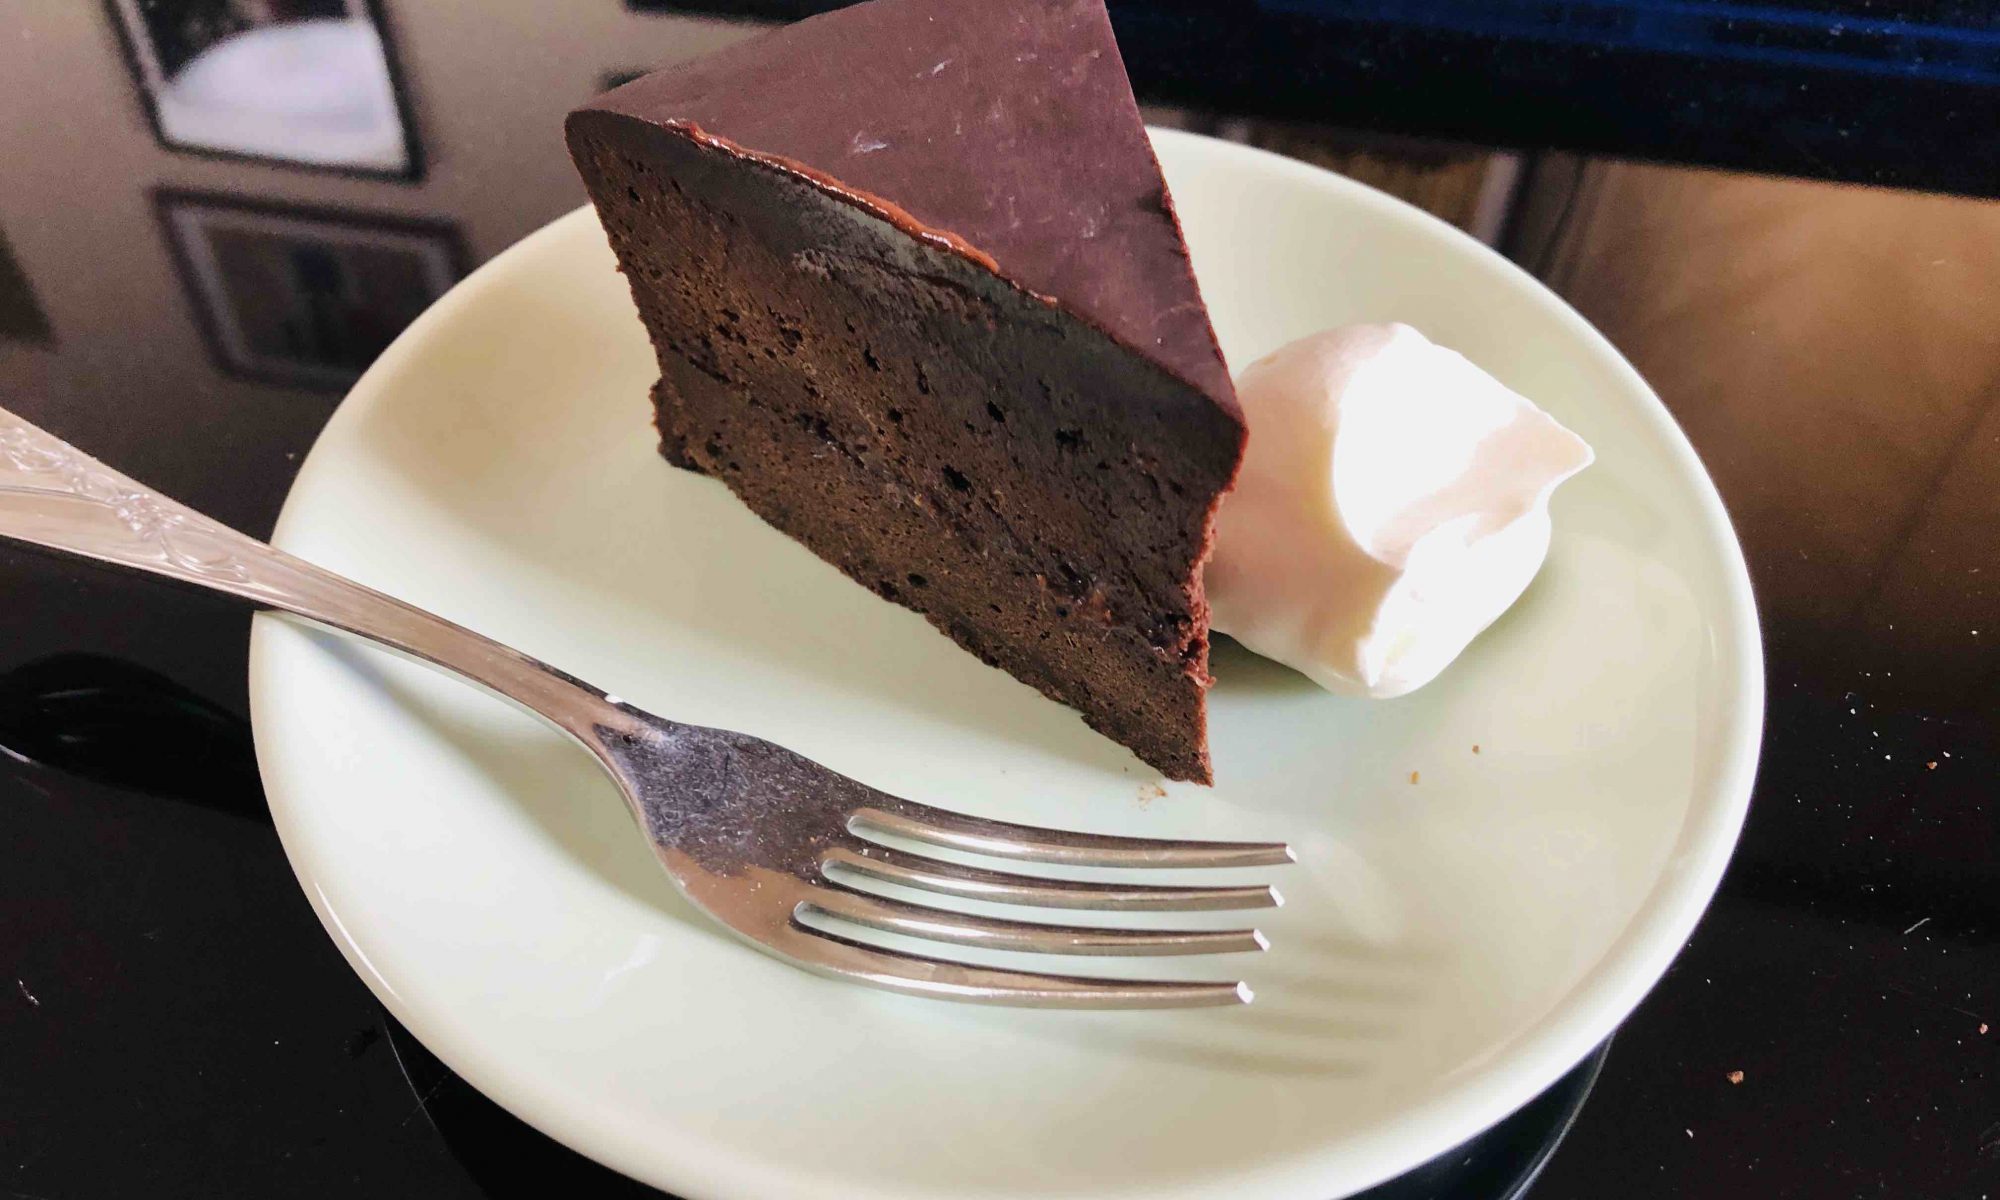
Strong-tasted Sachertorte ; Sponge Cakeを作る(その8) : カカオ85%ブラックチョコレートを用いて濃厚テイストのザッハトルテ( Hotel Sacher ver.)を作ってみた。

ザッハトルテ

バレンタインデーも近いですので、普段あまり手を出さないチョコレートスポンジケーキの王道”ザッハトルテ”を作ってみました。”Modern French Pastry”には、”チョコレートが苦手だという者は、単に素敵なチョコレートに巡り合っていないだけだ”とある。ならばということで、”究極のストロングテイストの”大人味チョコレートケーキを”というコンセプトでホテルザッハー風のザッハトルテを作ってみました。

Ingredients: 材料と配合組成

使用した材料は、苺(さぬきひめ:香川県産)、レモンジュース(100%レモン:サンキスト)、加塩バター(よつ葉バター:よつ葉乳業)、ダークチョコレート(ひとくちカカオ85%ブラックチョコレート:トップバリュー)、ココアパウダー(ピュアココア:VANHOUHTEN)でその他はいつもの材料です。

アプリコットジャムを使用するのがホテルザッハーのオリジナルレシピですが、今回はイチゴジャムを使ってみました。カカオのストロングテイストを満喫できる様にしました。

Strawberry JamAmount
Fresh strawberry 280 gram (2 pack)
Superfine Sugar105 gram
Lemon Juice6 gram
Strawberry Jam : When using granulated sugar, prepare a half volume (weight) of strawberries.
Sacher Chocolate Sponge CakeAmount for φ18cm cake pan
Salted butter210 gram
Powdered Superfine sugar56 gram
Egg Yolk (M)8 ea.
Dark Chocolate210 gram
Cake Flour125 gram
Bread Flour (Strong Flour)60 gram
Pure Cocoa Powder25 gram
Egg White8 ea.
Powdered Superfine Sugar56 gram
White Wine Vinegar3 gram
Vanilla Oil a few drops
Baking Trick170C x 40 minutes plus 180C x 10 minutes
Sacher Sponge Cake : The amount (weight) of salted butter equals to that of dark chocolate, to that of total volume of flour ( cake flour, bread flour and cacao powder).

チョコレートグレーズは、丁度ひとくちカカオ85%ブラックチョコレートを3パックを使い切る量で作成したためギリギリ1回分のグレーズが可能な量になっています。流動性に乏しいため1回行ける印象ですが、コーティングをきれいに仕上げることを考えるとチョコレートの量を200グラムに増量して生クリームを混ぜでグラサージュにした方がいいかもしれません。

Chocolate GlazeAmount
Dark Chocolate165 gram
Powdered Superfine Sugar125 gram
Water75 gram
Chocolate Glaze : The volume of this recipe is just only one batch for glazing. I think it better to use 200 gram dark chocolate and adjust each amount in proportion to it respectively.

Instructions: 調理法

<1>ストロベリージャムの作成

ザッハートルテのスポンジケーキにはアプリコットジャムを挟むのが常道ですが、今回はストロングテイストな大人味をコンセプトに仕上げていますのでカカオの強さを十分堪能できるよう即席のストロベリージャムを作成しました。
①シチュー鍋にイチゴを280グラム(2パック分)入れ、上白糖を105グラム加えます。
②レモンジュースを6グラム加え、しばらく室温で放置、浸透圧でイチゴから果汁がしみだして来るまで待ちます。
③木べらでイチゴを適当につぶして、木べらで混ぜながら中火で加熱して煮ていきます。どんどんイチゴが柔らかくなってきます。ハンディーブレンダーできれいにクラッシュできるレベルの柔らかさが目標です。
④沸騰したら一度500mLの耐熱カップに移し、ハンディーブレンダーでピューレにします。これを行うことで煮込み時間を短縮できますのでペクチンを使用ぜすグレーズ用のジャムを作成できます。
⑤シチュー鍋に戻し中火で焦がさないように木べらで混ぜながら濃縮します。木べらを引いてみてなべ底が瞬間的に見える程度の粘度で完成です。これ以上濃縮すると苺ジャムらしくなってしまいますので注意が必要です。
⑥使用時まで冷蔵庫で冷やしておきます。
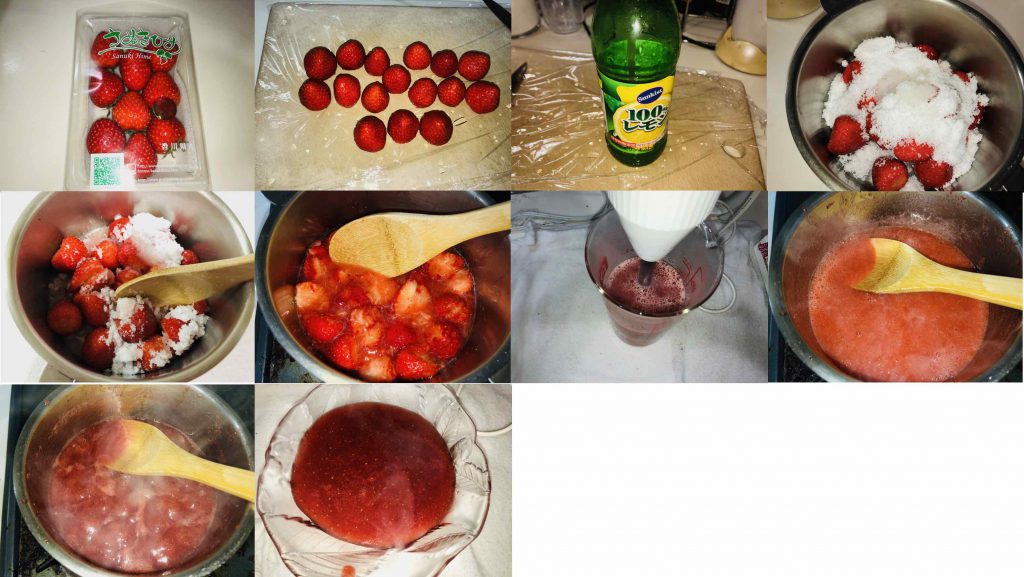
Preparing the strawberry jam for Sacher glaze: ① Place 280 gram strawberries and 105 gram superfine sugar, 6 gram lemon juice in a saucepan. Leave it at room temperature until it gets somewhat juicy. ② Crush the strawberries roughly with a wooden spoon. ③ Simmer it over the medium heat to bring it to a boil. ④ Transfer the strawberry mixture into a 500 mL measuring cup. Electric-blend until it gets in to puree. ⑤ Get the puree back to the saucepan. Simmer it over medium-low heat with stirring continuously with the wooden spoon and concentrate until you can see the bottom of the saucepan for a second when you stir the jam.

<2>ザッハースポンジケーキの作成

作成前に、φ18cmスプリングフォームケーキ型に市販のクッキングシートを貼り付けます。今回使用するバッターは非常に硬くて粘性が高いうえにケーキ型のほぼ上端まで入る分量になっていますので側面に貼るシートの高さは8cm位必要ですので注意が必要です(スフレチーズケーキの際と同様です)。オーブンを170℃で予熱しておきます。
また生地をメレンゲと混ぜるのが非常に困難ですのでメレンゲはsoft peakに仕上げます。soft peakメレンゲ作成のためあらかじめ粉砕上白糖を作成します。
ミキサーカップに上白糖を入れてミキシングします。
②パウダー状になったら乾燥したカップに詰めます、上白糖はすぐに水分を吸収しますので粉砕上白糖は毎回使用直前に作成します。
大ボウルにバター210グラムをキューブ状にカットして入れます。
電動ホイッパーである程度クリーム状にします。粉砕上白糖を56グラムくわえて完全にバタークリームになるまで混ぜます。
⑤卵を卵黄と卵白に分けます。卵白は使用時まで冷蔵庫に入れておきます。卵黄をバタークリームに1個加えて電動ホイッパーで完全に混ざ込みます。この操作を8回繰り返してきれいに乳化した卵黄クリームを作成します。
⑤ダークチョコレート210グラムを耐熱ボウル(中)に入れて溶かします。方法はBain-marie(または電子レンジで約30秒)を用います。いずれしても85%ダークチョコレートは非常に油脂が少ないですので粘度が高くスパチュラで混ぜて均一にするのに少し難渋しました。全部解けきったら湯煎から外して少し冷まします。
⑥粘度が極めて高いチョコレート液になりますのでスパチュラで混ぜていて少し粘度が下がり始めたらすぐに卵黄クリームに投入して電動ホイッパで急いで混ぜ込みます。スパチュラでホールドしてみて均一に乳化できていることを確認します。
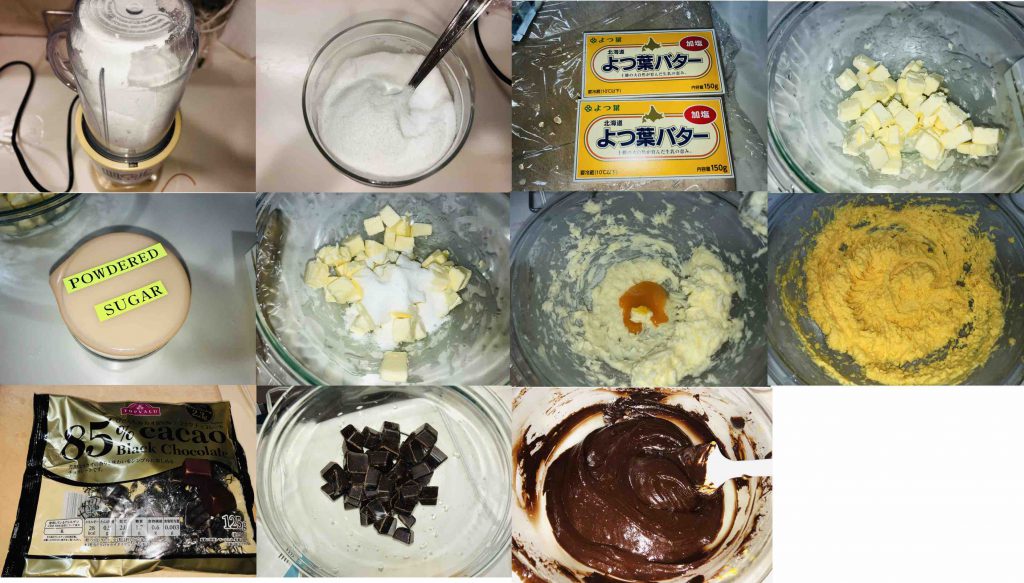
Making Sacher chocolate sponge cake : In advance, prepare powdered superfine sugar to electric-mix typical superfine sugar into fine powder. Line parchment paper on the bottom and the side of φ18 cm cake pan. Preheat the oven up to 170C. ① Dump 210 gram salted butter in a large bowl and electric-whisk roughly. ② Add 56 gram powdered superfine sugar and continue to electric-whisk until it gets creamy and well incorporated. ③ Separate egg yolks from egg white. Place 1 egg yolk into the butter cream to electric-whisk until well incorporated. Repeat that procedure 8 times until all egg yolks are exhausted. Do not mix all at one time. ④ Dump 210 gram dark chocolate into a middle heat-durable bowl. Melt the chocolate over simmering water in a saucepan (Bain-marie). ⑤ When the fluid chocolate gets a little thick, pour it into the egg yolk-butter mixture to electric-whisk until well incorporated.


⑦メタルボウルに卵白8個分を入れ3グラムの白ワインビネガーを加えて電動ホイッパーで混ぜます。
⑧若干soft peak気味になったところで粉砕上白糖56グラムを2回に分けて投入し、電動ミキサーで攪拌してsoft peakメレンゲに仕上げます。メレンゲの硬度をこれ以上上げると粉類との混合が困難になりますので注意が必要です。
⑨go back methodに従いメレンゲを少量チョコ卵黄クリームに投入しスパチュラで丁寧に混ぜ合わせます。これをメレンゲボウルにもどします。丁寧にdown to up foldで均等になるよう混ぜ合わせます。この時香りの調整にバニラオイルを数滴滴下しておきます。
⑩薄力粉125グラム、強力粉60グラム、純ココアパウダー25グラムを一度別容器に篩い、フォークで均等になるように混ぜます。塊を極力減らすためにこれをチョコレートメレンゲの上から篩います。
スパチュラで丁寧にcenter to margin & down to up foldしていきます。こんなものを本当に混ぜることが出きるのかと思える粘度ですが、丁寧に混ぜるとheavy volumeの超粘調バッターが完成します。
⑫用意しておいたケーキ型に生地を流し込み適度に表面を整えます。この粘度では内部大きな気泡を追い出すのは困難ですが何回かトントンと机の上にケーキ型を落として気泡を追い出しておきます。170℃で40分前後焼灼したあと、竹くしで中心まで焼成できたかどうか確認(予想通り不十分です)の後、180℃で焼成10分程追加して仕上げます。
⑬クーリングラックにおいて室温で冷めるのを待ちます。
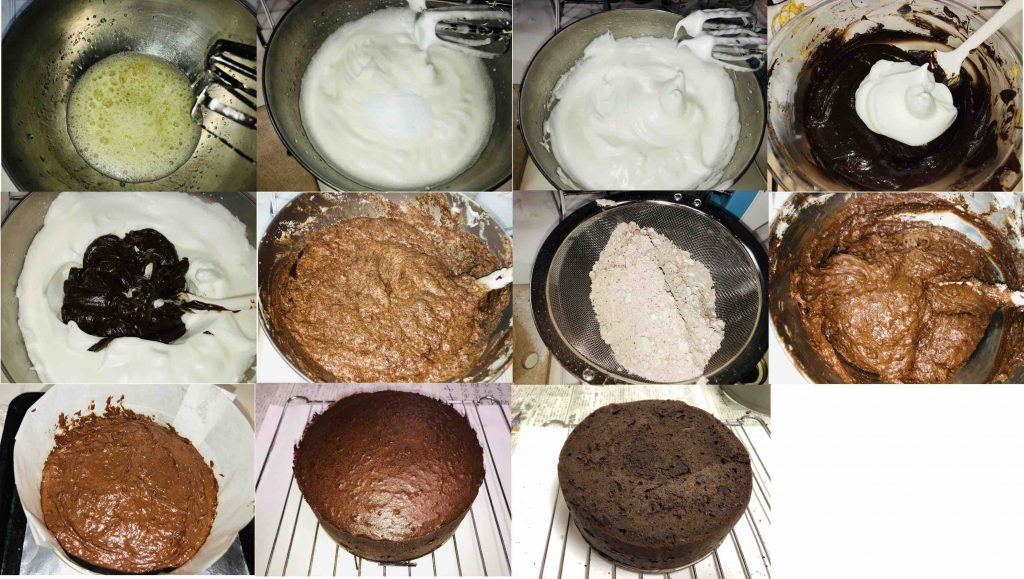
Making soft peak meringue and batching : ⑥ Place 8 egg whites and 3 gram white wine vinegar into a metal bowl. Electric-whisk roughly at low speed until it turned white and fluffy. ⑦ Gradually adding 56 gram sugar in 2 batches, electric-whisk until the soft peak form. Do not over-whisk. ⑧ According to “go back method”, mix the soft peak meringue and chocolate dough with folding it gently with a spatula. Give it a few drops of vanilla oil on folding. ⑨ Sift 125 gram cake flour, 60 gram bread flour and 25 gram cocoa powder in a large cup to stir it well with a fork. Then sieve it over the dough and fold it gently until well incorporated. Although the butter is too hard to fold well, do not surrender to intimidation. ⑩ Pour the batter in to the cake pan. Oven bake at 170C for 40 minutes and additionally at 180C for about 10 minutes. After that, leave it on a cooling rack at room temperature.

<3>チョコレートグレーズの作成

今回のチョコレートグレーズはすぐに固まってしまうほど粘調ですので先にアッセンブリングを済ませてから最後に作成します。
①小型の計量鍋(またはシチュー鍋)に水75グラムと粉砕上白糖125グラムを入れて中火でボイルさせます。ボイルしたら火を止めます。
②80℃位に下がったところで、ダークチョコレート165グラムを全部投入しフラワーホイッパーで混ぜます。
③解けて均一混ざったら完成です。この時温度は69℃でした。
この後、通常はテンパーリングを行い、融点の30℃付近になったところでグレージングするのですが、今回のチョコレートでは流動性が低すぎて60℃を下回るとかなり流れが悪くなるようなのでスパチュラで流動性が悪くなったと感じたところでグレージングしていますので何℃でグレージングしたかは分かりません。

Making Chocolate Glaze : ① Pour 75 gram water and 125 gram powdered superfine sugar in a saucepan over medium-high heat. ② When it comes to a boil, turn off the burner. Once the temperature has dropped down to 80C, dump 165 gram dark chocolate into it. Stir well with a balloon whipper.

<4>アッセンブリング

スポンジケーキ最下面のテフロンプレートは最後に外すようにします。これは中心部へ熱の伝わりが悪いとあらかじめ想定される生地を焼くときの約束事項で、側面モールド解除後に生焼けが判明した時、再度焼成を追加することで成功に持っていくためです。
①スポンジケーキの上面をカットして水平にします。このとき中心部まで熱が伝わっているか目視でも確認します(もし中心部の焼きが甘い場合、このままもしくは、再度モールドを装着してオーブンで追加焼成します。大部分の場合、プラス10℃で10分位焼成すれば十分です)。
②1/2の高さでカットしてスポンジケーキを2分します。ここでも問題なければひっくり返して下面のプレートとクッキングシートを剥がします。
③前もって作成したグレーズ用のジャムを下段のケーキの表面に十分塗ります。
④残りのカットした対になるスポンジケーキを乗せます。表面にジャムを塗ります。ここで一旦冷蔵庫に入れて表面のジャムを固めておきます。
⑤一番下に大きな平皿、その上にクーリングラック、その上にスポンジケーキを乗せます。
⑤出来上がったチョコレートグレーズを最上段からかけます。パレットナイフで表面を平らにします。この時長い大きなパレットナイフがあれば一回で表面を平らにできますのできれいな仕上がりにあります(私は持ち合わせていませんので現在使用してしているもので妥協です)。
⑥平皿に落ちたグレーズは2度目のグレーズに使用できますし、コップに集めて冷蔵庫で固めて利用することもできます。ケーキを3時間ほど冷蔵庫で冷やせば完成です。
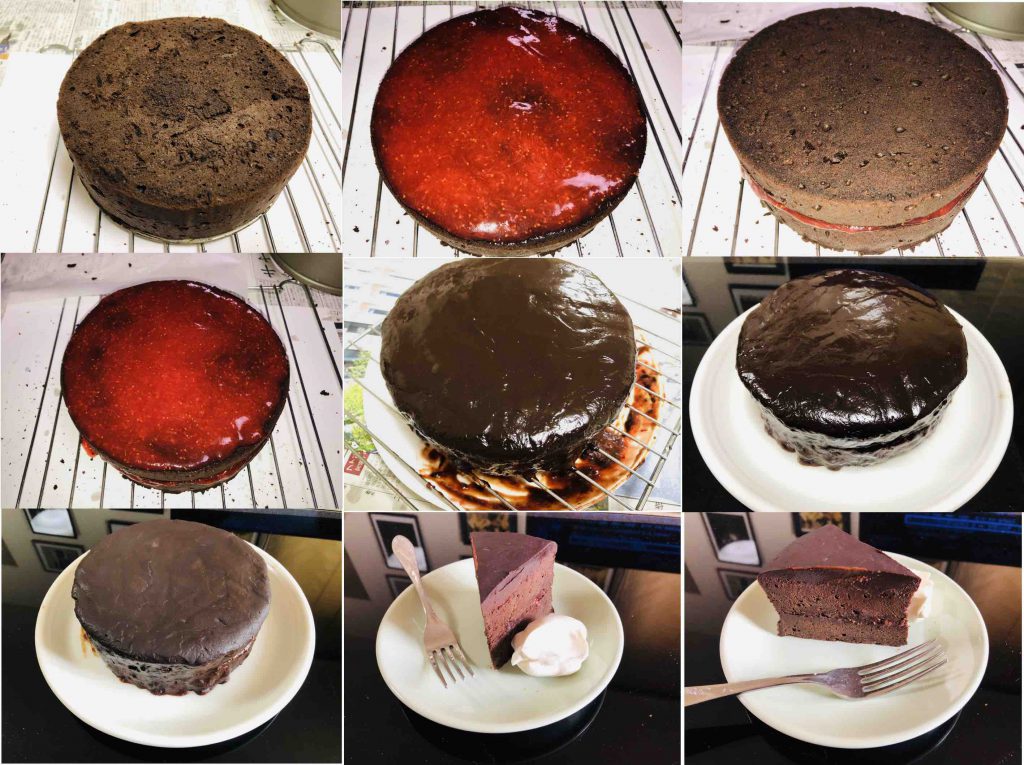
Assembling : ① Cut the sponge cake horizontally into 2 parts of the same volume and remove irregular surface. ② Paste the strawberry jam sufficiently on the surface of the lower layered sponge cake. Put the another sponge cake on it. Similarly pour the jam on top. Lastly glaze the chocolate. ③ Chill it in a frige for about 3 hours.

強烈にカカオが効いていますので、生クリームを添えました。

編集後記
大部分のダークチョコレート(スイート)の融点は30℃前後にありますので溶解温度は50℃くらいでゆっくり行うのが定石です。今回の85%カカオチョコレートは融点がどうやら40℃を超えているような印象でした(Bian-marieで溶解した際の感触です)。通常はドロドロに解けて再び硬くなる30℃あたりまでとろとろした状態が維持されますのでテンパーリングが素人でもそこそこに可能なのですが比熱の問題なのかよくわかりませんが温度変化に対する流動性が低下が大きすぎる印象でした(たぶんもともと融解した時点での流動性が低すぎるのだと思いますが?)。悠長にテーパーリングなどやってる暇もなく、実際グレーズした際の温度は?です。電子レンジでの溶解は、油断しているととんでもないことになることがあるのでやはりBain-marieが安全で確実だと思います。
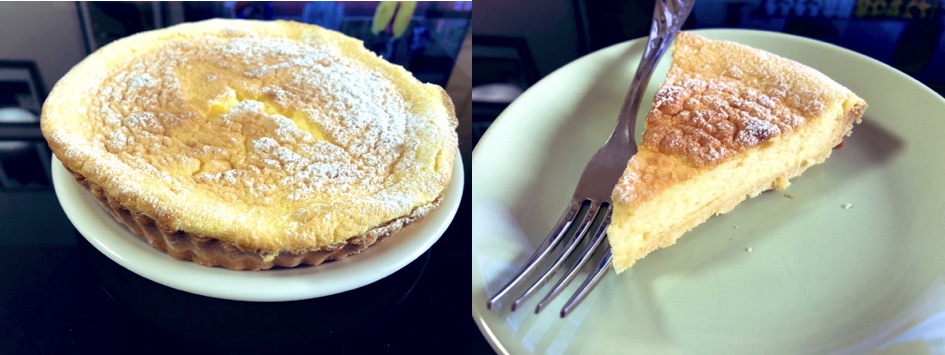
Baked Cheesecakeを作る(その1); スフレチーズケーキを作る part 1 : 日本が起源と言われるベークドチーズケーキの王道”スフレチーズケーキ”を焼いてみました。湯煎焼きの基本テクニックと焼き時間の公式。

スフレチーズケーキ

スフレチーズケーキ : Soufflé Cheesecake as Japanese Soufflé Cheese cake part1

スフレチーズケーキは、正式にはJapanese Soufflé Cheesecakeと呼ばれオリジンは日本だそうです。ベークドチーズケーキに使う生クリームを牛乳に変更して湯煎で焼き上げることでふんわりと仕上がるのが特徴です(カロリーも控えめになります)。スフレチーズケーキの焼成は、ほとんどのオーサーが湯煎で160℃ x 50~60分(表面が狐色に焼けるまで)を標準手法としているようです。

Ingredients: 材料と配合組成

使用する材料は、いつもの近所のスーパーで入手できる材料です。アプリコットジャムを表面にコーティングして少し味にインパクトを加えました。レモンエッセンスは香りが結構強いですので2~3ドロップで十分です。バターを加えて少し食感をリッチにしています。

IngredientsAmount for φ18 cm cake pan
Cream Cheese200 gram (1 pack)
Butter (salted)40 gram
Whole Milk80 gram
Lemon Essencea few drops
Lemon Juice10 gram
Egg Yolk (M)4 ea. ( 80 gram )
Cake Flour25 gram
Bread Flour25 gram
Cornstarch 16 gram
Egg Whites (M)4 ea. (120 gram)
White Wine Vinegar3 gram
Superfine Sugar90 gram
Vanilla Oila few drops
Apricot Jam 150 gram for frosting
クリームチースは、市販のもの1パック(雪印メグミルク)、バターは北海道バター、レモンジュースはサンキスト100%レモン、アプリコットジャムはアヲハタ55 アンズジャムを使用しました。使用する全卵の量はクリームチーズと1:1の等量配合です。

Instructions: 調理法

まず、springform panの底面と側面にクッキングシートを貼り付けます。スフレチーズケーキはpanの壁面を大きく超えて丈が伸びてきますので側面のクッキングシートは10cmの高さにします。次に、湯煎焼きの際に水が入ってこないようにアルミホイルで2重に底面をカバーしておきます。オーブンを160℃に予熱しておきます。
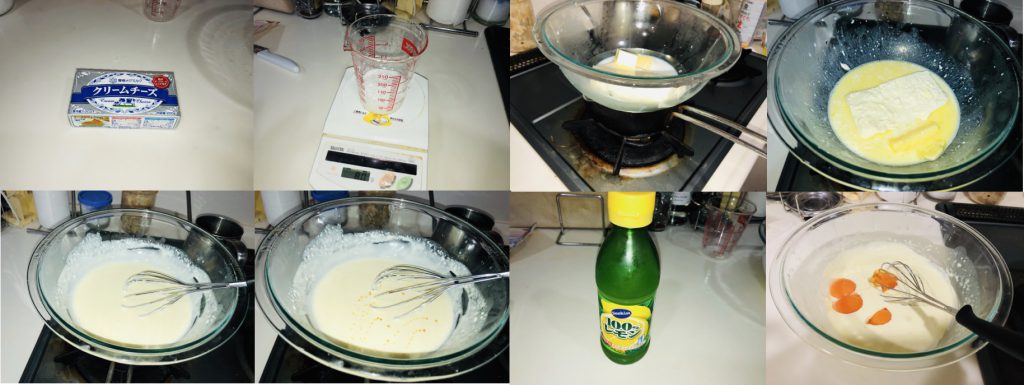
①クリームチーズ200グラム、バター40グラム、牛乳80グラムを大型の耐熱ボウルに入れ、Bain-marieで完全にクリームとバターを溶かして混合します。
②加熱を止めて、レモンエッセンス数滴とレモンジュース10グラムを加え十分に混ぜます。
③全卵を卵黄と卵白に分け、卵黄4個を加えて均等になるまで最小限に混ぜます。

Making batter : In advance, line parchment paper on the bottom and side of a φ18cm springform cake pan. The lateral paper shield needs 10 cm hight at least because a cake rises over the side wall of a cake pan. Then cover the bottom of the cake pan with 2 layers of aluminum foil overlapped. Preheat the oven up to 160C. ① Place 200 gram cream cheese, 40 gram butter, and 80 gram whole milk into a large bowl and warm it up over a double boiler (Bain-marie) on medium-low heat. ② Stir evenly until smoth. Then, remove fron heat and add a few taps of a lemon essence and 10 gram lemon juice. Stir evenly. ③ Separate 4 whole eggs to egg yolks and egg whites, and refregerate egg whites in a fridge until use. Dump 4 egg yolks into the cream cheese mixture and whisk evenly.

薄力粉25グラム、強力粉25グラム、コーンスターチ16グラムを上から篩い、スパチュラで丁寧に混ぜていきます。混ざったら室温で置いておきます。
⑤次にメタルボウルに卵白4個、白ワインビネガー3グラムを投入し、電動ホイッパー(low speed)で混ぜます。
⑥soft peakに達したら上白糖を30グラム加え、回転速度を上げて泡立てを続けます。90グラム加えますので3回この操作を繰り返します。
⑦stiff peakに到達したら泡立てを中止します。メレンゲの準備完了です。

Making meringue : ④ Sift 25 gram cake flour, 25 gram bread flour and 16 gram cornstarch over the egg yolk- cream cheese mixture. Fold it evenly until no powder chunk shown. Put it aside. ⑤ Place 4 egg whites and 3 gram white wine vinegar into metal bowl and electric-whisk at low speed. ⑥ When it gets into the soft peak form, adding 30 gram superfine sugar, continue to electric-whisk at high speed. Repeat the same procedure at 3 times until the sugar is exausted. ⑦ Stop whisking at the stiff peak form. The meringue has done.

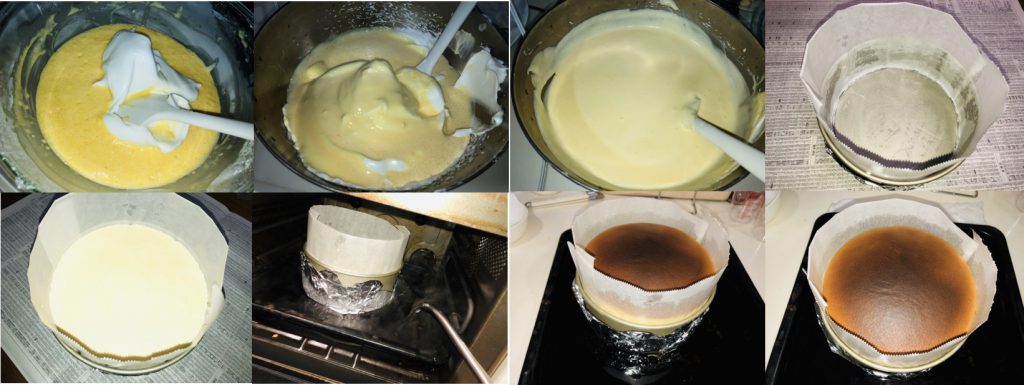
⑧メレンゲを1/3ほどーズ混合液に加え、スパチュラで混ぜてなじませます。
⑨Go back methodに従い、メレンゲに上記を全部戻し今度はゆっくりと丁寧に混ぜて(fold)ていきます。メレンゲの塊がなくなって均一になる最小限の回数だけfoldを繰り返します。
⑩用意した焼型に生地を注ぎます。
⑪天板に乗せ、お湯を底面から1cmを超える深さになるまで加えます。
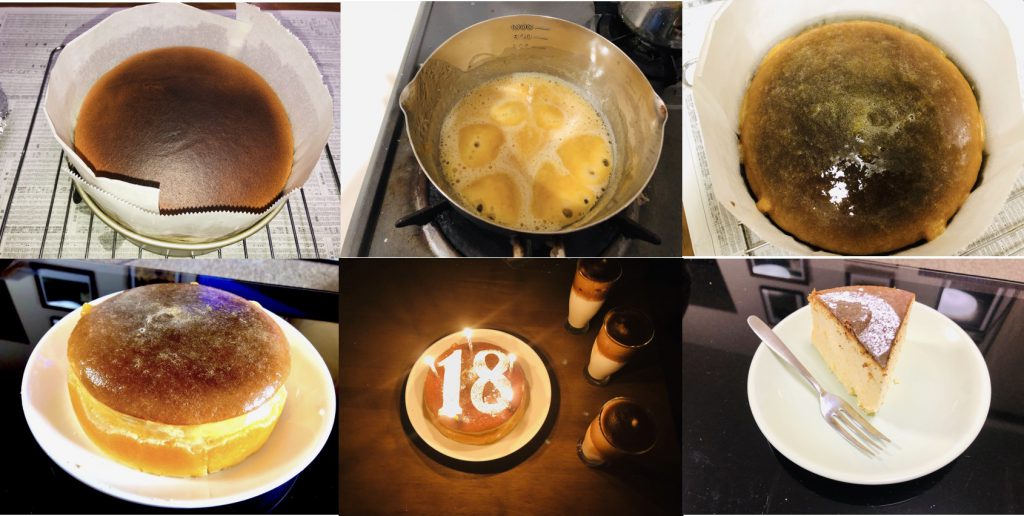
⑫160℃で60分ほどオーブンで調理します。時間は表面の焼き色を見ながら微調整します。この後、加熱を止めオーブンのドアを少し開いて(割り箸を挟んだ程度の隙間を作ります)予熱で20分位じっくりと中心部まで熱を加えておきます。
⑬オーブンから取り出して室温で冷まします。クッキングシートの油の跡から2cmくらい丈が縮んだことが分かります。

Preparing for oven-baking : ⑧ Dump 1/3 volume of the meringue into the cream cheese mixture and fold it with a spaula until well incorporated. ⑨ Accoring to go back method, return it back into the meringue in the metal bowl. Fold it gently to avoid deflating the meringue until no meringue mass shown. ⑩ Pour the batter into the prepared mold (pan). Tap the pan and release large air bubble with stirring by a stick. ⑪ Place the mold on the bking plate filled in hot water which requires 1cm depth at least. ⑫ Oven-bake in the hot water bath at 160C for about 60 minutes until the surface gets golden brown. Then turn off the oven and leave the cheese cake with the door slightly opned for about 20 minutes. ⑬ Cool it completely at room temperature although the cake loses its volume in the hight.

⑪市販のアプリコットジャムを一瓶鍋で煮込んで液化させて、ブレンダーで果肉を粉砕してピューレにします。
⑫ケーキの上面より注ぎます。このままモールドを外さずに3時間以上(できれば1晩)冷蔵庫に冷やしておきます。

Assembling : ⑪ Dump 1 cup of an apricot jam into a saucepan to dissolve over medium heat. Blend it into puree with a handy-blender. ⑫ Pour the puree over the cake. Let it chill with unmolded in a fridge overnight..

チーズケーキの焼き時間の公式
150℃~160℃ X 50~60分(表面が狐色に焼けるまで)
その後オーブンをオフにして若干ドアを開き気味にして予熱で20分位焼き進みを加える。

編集後記:スフレチーズケーキはメレンゲをしっかり立てると大きく膨らみますが、その分食感を失う(歯ごたえがなくなる)感じがします。私はこの感じが少し嫌です。シフォンケーキ同様にバターを少し加えることで物足りなさを補うことができるように感じます。仕上がりの食感は、ベークドチーズケーキと通常のスフレチーズケーキの中間くらいに仕上がります。ふわふわのスフレがお好みの方はレシピからバターを除けばスフレチーズケーキの標準レシピになります。うまくいけば10cmの高さまで膨らむかもしれませんよ。

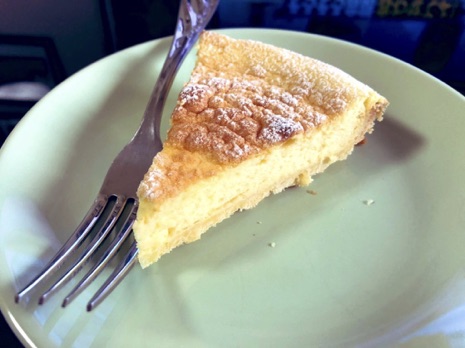
Tartを作る (その1); レモンメレンゲタルトを作る: レモンカードとメレンゲを等量混合してパートスクレに乗せてふわふわのタルトを焼き上げてみました。

レモンメレンゲタルト

スフレ・レモンメレンゲタルト: Soufflé Lemon Meringue Tart

レモンカード(Lemon Curd)を作成したところでいよいよこれを使ってお菓子を焼いていきます。レモンカードタルトは定番となりますがこれにもいろいろなバージョンがあります。今回はレモンカードを作成した際に残った卵白でメレンゲを起こし、レモンカードと等量混合してふんわりと爽やかな食感のスフレ風タルトに仕上げてみました。

Lemon Meringue Tart Version1

Ingredients: 配合組成は以下の通りです。

必要なものはレモンカード200グラムとパートスクレ1個(φ18 cm)です。レモンカードは前回アップしたものを使用します。焼き型にはφ18 cmのタルトパンを用います。タルトクラストを先に焼き上げますので基本のパートスクレを焼くことができればほぼ完成となります。バターが入手困難になってきていますので、通常使用料の1/3をマーガリンに置換します(チーズに置き換えるのもいいかもしれません)。その分ドウが軟化して扱いににくくなりますので冷凍庫にいれて冷却して固めます。緩まないうちに速攻でタルト型にマウントします。

For Pate a ScureeAmount for φ18 cm tart pan
Butter (Salted)40 gram
Margarine20 gram
Powdered Superfine Sugar30 gram
Almond Flour15 gram
Cake Flour45 gram
Bread Flour40 gram
Beaten Egg (M)1/2
Pate Scuree : Now butter is hardly available. Substitute 1/3 volume of butter with margarine. The dough will gets softened than usual. Chill it in a freezer until it gets firm and quickly proceed the following steps.
For Lemon Curd MeringueAmount for 1 tart crust
Egg Whites (L)4 ea. (166 gram)
White Wine Vinegar3 gram
Powdered Superfine Sugar30 gram
Vanilla oila few drops
Lemon Curd (Prepared)200 gram
Lemon Curd Meringue: Combine the same volume of the stiff peak meringue and the lemon curd.

Instructions: 調理法

(1)パートスクレ作成法

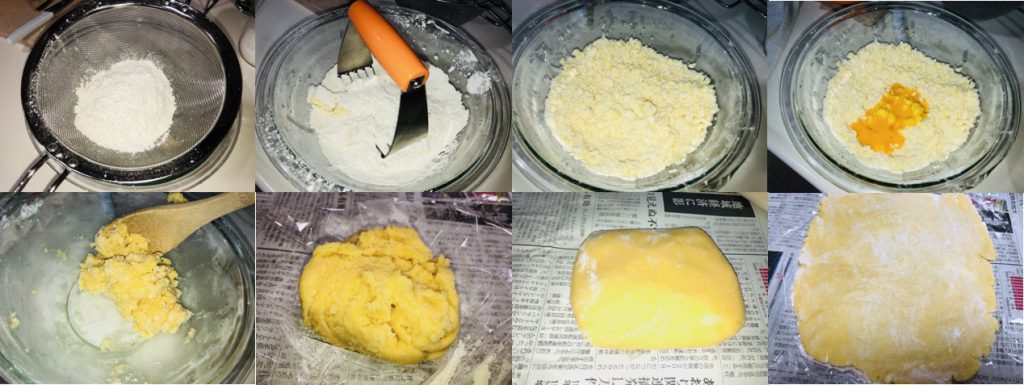
①粉砕上白糖30グラム、アーモンドフラワー15グラム、バター40グラム(1 cmくらいのキューブにカット)、マーガリン20グラムをボウルに入れペーストリーブレンダーで切るようにして混ぜていきます。ラフに混ざる程度でいいです。
②薄力粉45グラム、強力粉40グラムを篩い、ペーストリーブレンダーで切るように混ぜていきます。この段階でバターを米粒サイズくらいまで粉砕します。
③溶き卵を1/2個加えます。木べらで優しく混ぜて若干ペースト状で塊状にまとまるレベルに仕上げます。
④ラップ上に強力粉を少し撒いて、その上にドウをのせます。正方形に包んでローリングピンでプレスして平坦にします。このまま冷凍庫で約15分冷却します。
⑤取り出して表面に強力粉を少量篩います。ローリングピンでプレスして大体3~5 mm厚に均等に広げます。タルト型より大きくなっていれば十分です。

Making dough of pate a scuree: ① Place 30 gram powdered superfine sugar, 15 gram almond flour, 40 gram butter (cubed) and 20 gram margarine in a middle bowl and press to combine roughly. ② Sieve 45 gram plain flour and 40 gram bread flour over it. Press to combine until the butter gets into the size of rice. ③ Pour 1/2 volume of 1 beaten egg and mix gently with a wooden spoon until the dough settles into shape. ④ On a floured surface of plastic-wrap, place the dough to fold it into the square shape. Roll the dough to flatten. Chill it in a freezer for about 15 minutes.⑤ On a floured surface, roll the dough into the 3 to 5 mm thick which should be larger than a tart pan.

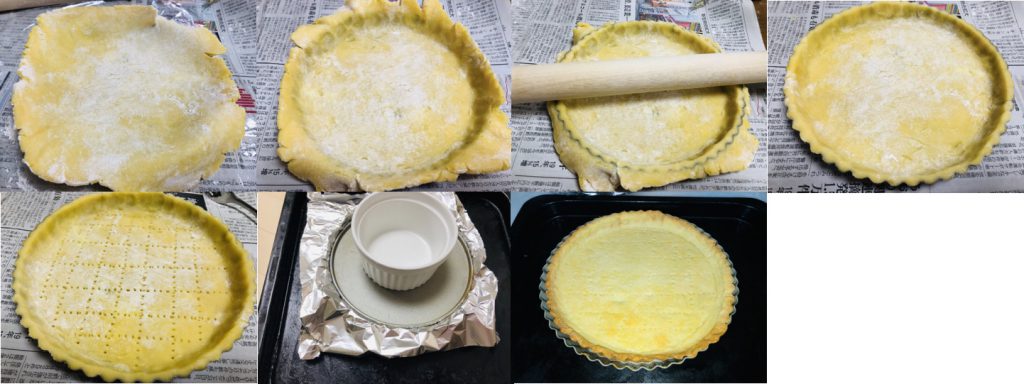
⑥ピンに巻き取ってタルト型の上に広げまず。タルト型のギャップに合うように少し重ねるように側面の凹凸に生地を添わせます。この後スプーンで中心から辺縁に向かって軽く押して平らに仕上げ、ギャツプを埋めます。
⑦表面をローリングピンで前後して余分の生地を切り離します。
⑧もう一度厚さが一様で、ヒビが入っていないか最終確認します。不都合があれば強力粉を少し撒いて、スプーンで軽く押して整えます。
⑨フォークで縦横に脱気用の小孔をあけておきます。冷凍庫でもう一度15分ほど休ませます。この間にオーブンを170℃に予熱しておきます。
⑩表面にアルミフォイルを敷いてその上にφ18 cmのケーキパン用の底蓋をのせます。この上に重しとしてラメキンをのせます。これは焼いたときに底が浮き上がるのを防止するためです。タルトストーンを使うのもいいと思いますがわざわざ購入するほどのものでもないと思います。
⑪オーブンに入れて170℃で15分まず焼き上げます。このあと一回取り出して重しとアルミホイルを取り除きます(パンナコッタやココナツミルクを後で充填する場合は、ここで残りの溶き卵でエッグウオッシュしておくとタルトへのしみ込みを抑えてくれます)。オーブンに戻しさらに170℃で5分追加焼きして仕上げます。
⑫取り出してクーリングラックの上で常温で冷まします。

Oven-baking of the dough: ⑥ Loosely roll the dough around the rolling pin. Place the dough over the tart pan to be unrolled. Dust roughly to push the dough into the corner to remove any gaps. Using a floured spoon, lightly press the dough from the center to margin and flatten it evenly. Cover the rim of the pan. ⑦ Move the rolling pin to and fro along the top of the pan to trim the edges. ⑧ Confirm the dough is tightly attached to the pan with no crack. ⑨ Prick the dough all over with a fork for the air to go through the dough while baking. Chill it in a freezer for about 15 minutes. Meanwhile preheat the oven up to 170C. ⑩ Take the dough out from the freezer. Cover the top with aluminum foil and place the bottom-plate of the cake pan. Put the ramekin as weight on the plate instead of a tart-stone. ⑪ Oven-bake at 170C for 15 minutes, then remove the all of the weight and aluminum foil. Oven-bake for 5 minutes furthermore. ⑫ Let it cool at room temperature.

(2)レモンメレンゲの作成法

いつものメレンゲ作成の常法(separation forming method)に従いますので端折ります。
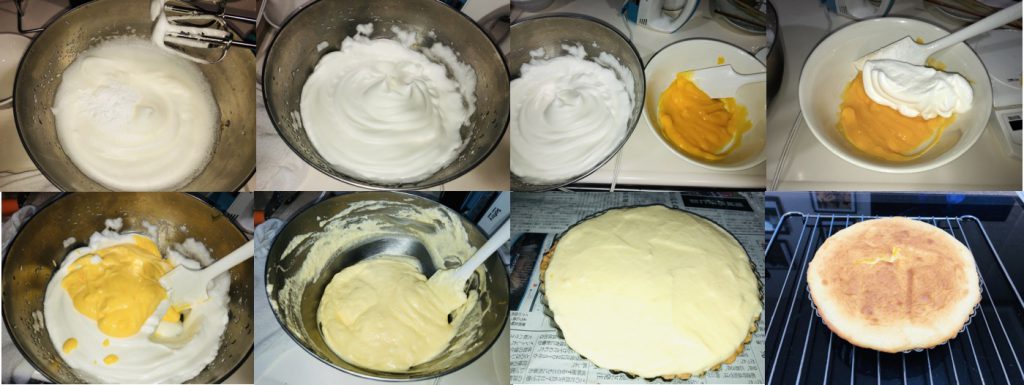
①卵白4個分をメタルボウルに入れます。白ワインビネガーを3グラム注ぎ電動ホイッパーでlow speedで泡立てを始めます。
②2分位でsoft peakに到達したところで粉砕上白糖30グラムを加えます。よくかき混ぜてhigh speedでstiff peakまで仕上げます。バニラオイルを少し加え、低速で混ぜてキメを整えます。
レモンカードにメレンゲ1/3を加えてなじませます。
④Go Back Methodに従い、メタルボウルにこれをすべて戻しスパチュラで丁寧に混ぜていきます。均等に混ざったら出来上がりです。爽快なレモンの香りがします。
⑤冷やしておいたタルトクラストにレモンメレンゲを詰め込みます(少し多めでしたのでめいっぱい詰め込みました)。4/5くらいの高さまでのところで控えめに詰め込んだ方が仕上がりは美しいと思います。
⑥170℃で約20分焼いて表面がゴールデンブラウンになったところで出来上がりです。
⑦室温で冷ましたのち、冷蔵庫に保管します。

Making Lemon Meringue: ① According to the separation forming method, place 4 egg whites and 3 gram white wine vinegar in a metal bowl. Electric-whisk at low speed until the soft peak form. It usually takes about 2 minutes. ② Add 30 gram powdered sugar and continue whisking at high speed until the stiff peak form. Then drop vanilla oil at a few drips. Even the meringue with whisking at low speed. ③ Dump 1/3 volume of the meringue in the prepared lemon curd to fold it well. ④Get the mixture back to the meringue in the metal bowl, fold it gently until well incorporated. ⑤ Pour it into the tart crust and flatten it. ⑥ oven-bake at 170C for about 20 minutes until the surface gets golden brown. ⑦ Let it cool at room temperature and keep it in a fridge until served.

少しパウダーシュガーを振るうとさらにおいしくなります。爽快な気分にしてくれる一品です。

Sponge Cakeを作る (その4); シフォンケーキを極める part 1: シフォンケーキの基準点となるエンゼルフードケーキを一般公開されているBoston Cooking Schoolの標準レシピに忠実に作成、high ratio cakeの神髄に迫ってみました。

エンジェルフードケーキ

 エンゼルフードケーキ: Classic Angel Food Cake

Swiss Roll用のスポンジケーキの黄金比を前回捻出しましたが、この比率は非常にシフォンケーキの組成に酷似しています。これは単においしい生地はシフォンケーキであると肯定したにすぎません。そこでシフォンケーキの原点であるクラシックエンゼルフードケーキ(卵黄混合なし、油脂混合なし、ベーキングパウダー混合なし)から少しずつ卵黄/油脂を混合していきオリジナルなシフォンケーキの混合比とHigh ratio cake(砂糖の添加量が小麦粉に比べて相当多いケーキ)に関して極めてみたいと思います。

まず、ゼロに値するもの(卵黄なし)をまず作成してその食感を確かめる必要がありますが、これには①エンゼルフードケーキ(油脂、ベーキングパウダー混合なし)と②ホワイトスポンンジケーキ(バター(混合比 小麦の重量の約1/2)、ベーキングパウダー混合)があります。いずれも基本レシピは周知されていますが、前者はhigh ratio cake(1:2)になります。断面は両方ともピュアーな白色調ですが前者は高級食パンをさらにモフモフにした食感(今回確認)で、後者は柔らかめのスポンジケーキのような食感(以前に確認)になります。油脂(バター)を加えることでの食感の方向性は前回のSwiss roll同様で重量感と保湿感を加える方向にベクトルが向きます。油脂の方向軸は見当がつきますが、砂糖を増量(high ratio)することに対する方向軸は現時点では確認できていません。

Ingredients: 基本のエンゼルフードケーキの配合組成は以下の通りです。原本(Boston Cooking School Cook Book, 1986) では、11個の卵白とグラニュー糖を用いていますが、グラニュー糖よりも卵白に親和性のより高い上白糖(superfine sugar)をさらにミキサーで粉砕したpowdered superfine sugarで統一しました。さらに10 inch(φ25 cm)相当からφ18 cmに減量換算し、卵白重量(実測値)にあわせて焼き時間も微調整しました。 φ18 cm のシフォンケーキ専用の焼き型を使用します。

IngredientsAmount for φ18 cm tube pan (chiffon cake pan)
Egg white (L)5 ea (210 gram)
Cream of Tartar3 gram
Salt1 gram
Powdered superfine sugar60 gram
Vanilla oila few drops
Almond extracta few drops
Cake flower60 gram
Powdered superfine sugar60 gram
Baking time170℃ x 35 minutes
Classic Angel Food Cake : The recipe is adjusted to a φ18 cm cake pan.

Instructions :
①上白糖120グラムをミキサーで砂粒状に粉砕します(8分位)。これでコーンスターチを含まないパウダーシュガーを作成します。
②薄力粉60グラムと作成したパウダーシュガー60グラムを混ぜて、これもミキサーにかけます。薄力粉を粉砕して細粒化/均質化することでメレンゲとの混合時に気泡消失を最小限に抑えるためです。

エンジェルフードケーキ01
The pictures show powdered superfine sugar and refined flour mixture.
Put superfine sugar into a blender to be crushed into fine powder. Mix the shifted cake flour and the powdered superfine sugar in a cup. Again, put the flour mixture into a blender to be fine powder so as not to deflate the meringue on folding.

③卵黄と卵白を分けます。(余った卵黄はカスタードクリームにしました。今回はsuper gigantic roll を作成してみました)。卵黄は冷蔵庫に保管しますが、今回は卵白は室温でしばらく放置しておきます。
④卵白210グラム(5個分)をメタルボウルに入れ、クリームオブターターを3グラム加えて電動ホイッパーで低速攪拌します。
③3分位でsoft peakに到達しますので30グラムの砂糖を加えてfirm peakまで高速回転で持っていきます。ここでバニラオイル/アーモンドエクストラクトで香りを加えておきます。この辺でオーブンを170℃に予熱しておきます。
④残りの30グラムの砂糖を加えてstiff peakまで持っていきます(ボウルをひっくり返しても動かなければstiff peakに到達していると判断します)。常温から泡立てしたメレンゲの仕上がりは色調も食感もマシュマロののような感じで低温から泡立てしたメレンゲとは仕上がりの感じは異なりますが、小麦粉を抱き込むだけならこちらのほうがかなり扱いやすいです。最後に粉を抱きかかえる工程で終了する場合はこの方法で泡立てしています。

エンジェルフードケーキ02
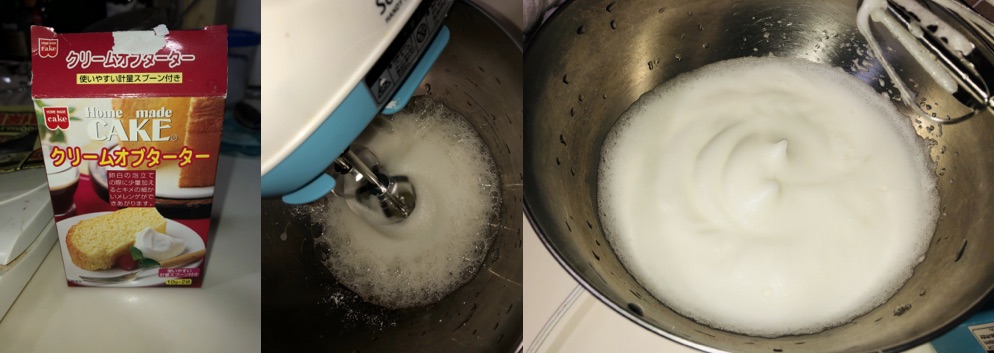
The pictures show “cream of tartar” (left), beginning of electric mixture (center), and soft peak form (right).
Separate egg yolks from egg whites, and leave egg whites at room temperature for a while. Place 5(210gram) egg whites and 3gram cream of Tartar in a metal bowl. Electric-whisk the egg whites. In a few minutes, it comes to a soft peak form. Adding a half volume of the powdered superfine sugar, continue to whisk at high speed until a firm peak form.
エンジェルフードケーキ03
The pictures show flavors (vanilla oil/ almond extract) (left), firm peak form (left-center), stiff peak form (center-right) and sieving flour mixture (right).
Then, put a few drops of flavor( vanilla oil and almond extract) into the meringue, and continue whisking until it gets to a stiff peak form. I think it somewhat differs from the stiff peak of the beaten with chilled egg whites. Sieve the flour mixture in 2 batches over the meringue.

⑤②で調整した粉類を1/2量ずつメレンゲに篩い、スパチュラで抱き込みます。混ぜにくいですので基本に忠実に中央から辺縁にむけて丁寧に混合(center to margin fold)を行い粉類の痕跡がなくなるまで混ぜます。
⑥シフォンケーキ用のセンターチューブのある焼き型に注ぎます。注いだ後、竹串で底にたまった空気や大きな気泡を追い出しておきます。ケーキパンの側面についた生地はできる限りキッチンペーパーで拭き取ります。焼くと生地は焼き型の側面を這いあってきますのでそれを邪魔しないためです。
⑦170℃で35分オーブン焼きします。焼き始めて15分くらいで表面がgolden brownに到達しますので表面割れ防止もかねてこの時上からアルミフォイルでカバーします。

エンジェルフードケーキ04
Going by the down to up fold method, fold the flour into the meringue until no grainy. Pour the batter into the cake pan and remove air bubbles with a skewer. Wipe out the protruding part of the batter. Oven-bake at 170C for about 35 minutes. If the surface of the batter comes to dark early, cover the top with aluminum foil.

⑧さかさまにしてマグカップの上に置いて室温で冷やします。重力を利用して縮みを最小限に抑えます。
⑨パレットナイフで辺縁を切り離して筒と一緒にケーキを抜きます。底面と中央を切り離してケーキをひっくり返して外します。これで完成です。

エンジェルフードケーキ05
Cool the cake upside down with the center tube on a mug. Then, release the margin with a palette knife and pick up the center tube. Release the bottom and center fall. Flip down the mold and drop the cake.
エンジェルフードケーキ06
The angel food cake is done.

このまま置いておくと私が一人で始末することになりますのでクレームシャンティでフロスティングしてキーウィとラズベリーをのせました。さすがにラズベリーは渋いので今回は10%ゼラチンと30%上白糖でナパージュを作成し2回塗りしました。
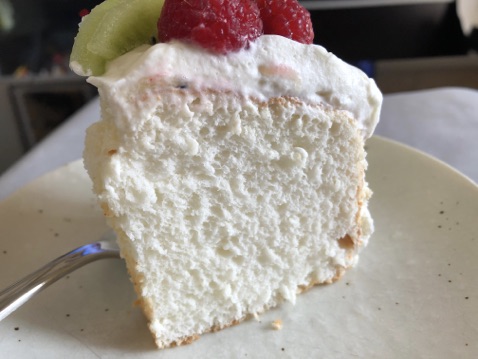
断面も食感もまるで”天使の羽”のような感じに思えました。これを最初に考え出した人、天才だ。

エンジェルフードケーキ07
The cut surface of the angel food cake looks fluffy and super-white like an angel’s wing.

<クレームシャンティイを簡単に速攻で作成する方法>

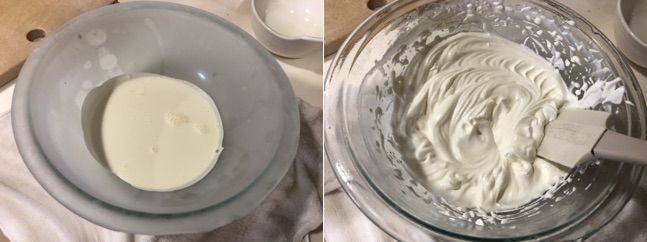
クレームシャンティイを作成する際、氷水で冷やしながらとほとんどのauthorが指南していますが氷も結構必要ですし煩雑です。これを簡素化する方法を私は用いています。
①使用する耐熱ボウルの内面を軽く水に浸し、軽く水切りします。
②電動ホイッパーのパドルも軽く水に浸し耐熱ボウルに入れてこのまま冷凍庫に入れます。
③10分ほどして取り出すと表面は完全に氷結して曇っています。
④パドルをセットしてすぐにボウルに冷蔵庫にある生クリームを注ぎます。
⑤粉砕した上白糖(powdered superfine sugar)を分量入れて、即座に低速攪拌開始します。
⑥3分間でstiff peakのホイップクリームができます。
(注意)耐熱ボウルの曇りが消失するまでに素早く作業は完了してくださいね。

編集後記
Swiss Rollの生地の極みが、単にシフォンケーキの生地にすり替えただけのような形で収束することにはなかなか受け入れがたい所が残ります。もう一つの選択肢となりそうなタンパク濃度11%位の”これぞスポンジケーキ”という配合組成からまたいつか改良を加えてみたいと考えています。

Gateau Magique (ガトーマジック)を作る; この1品シリーズ(その1): ガトーマジックケーキは、スポンジ(sponge)/カスタード(custard)/フラン(flan)の3層構造を持ち合わせたケーキ。焼成時間との3層構造の関係に迫ってみた。

ガトーマジック

ガトーマジックケーキ : Gateau Magique Sponge Cake

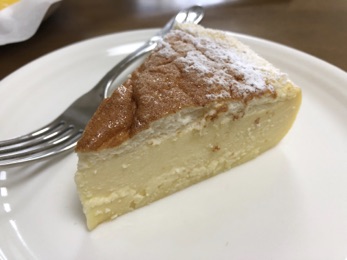
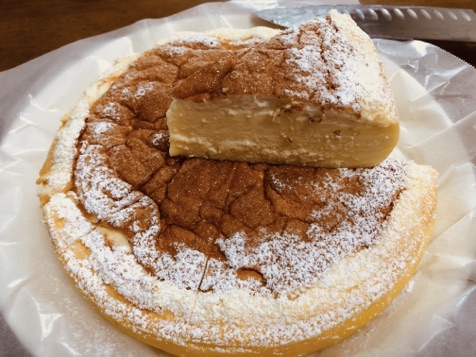
昨年末、仕事納めの親睦会をGateau Magique Cake(ガトーマジックケーキ)でおもてなししました。平日時間がない時でも作れるお勧めのデザートです。上から見ると外観は普通のスポンジケーキと大差ありませんが、側面は弾性硬のフランになっていて特徴があります。内面は上層からスポンジケーキ、カスタードクリーム、硬めのフランの3層構造になっています。

ガトーマジックケーキ
Gateau Magique Cake has 3layers (sponge cake, custard cream and flan, respectively).

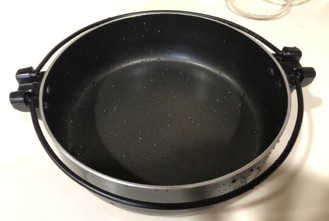
材料/分量は以下の様になります。プリン同様に水分の非常に多いケーキですのでいつものspringform panではだだ漏れになりますので、焼き型には直径20cmのgrill pan(グリルパン)を使用します(取り出しも楽で焼き時間も短縮できますし、何より湯煎工程を回避できます)。分量はグリルパン1杯分(約95%容積率)合わせた量です(多いですが牛乳はきっちり使えます)。バターは北海道バター(含塩)、牛乳は酪農牛乳を使用しています。

グリルパン
Teflon coated grill pan φ20cm X 5.5cm depth

Ingredients : 材料と配合組成

IngredientsAmount needed
4 Egg yolks(L)120gram
Superfine sugar65gram
*Water*1tbsp(15gram)
Melted Butter(salted)120gram
Salt1gram
Cake flour1cup(120gram)
Warm whole milk500gram
4 Egg whites(L)160gram
White wine vinegar2-3gram
Superfine sugar25gram
Vanilla oilany you want
Gateau Magique Sponge Cake :

Instructions: 調理法

①まず全卵をegg yolk(卵黄)とegg white(卵白)に分けます。egg whiteは冷蔵庫で使用直前まで冷やしておきます。
②大型耐熱ボウルで、egg yolkとsuperfine sugar(上白糖)をballoon whisk(フラワーホイッパー)を用いてBain-marieで十分に混ぜます(泡立てる必要はありません)。*Bain-marieのときは水を加えなくても砂糖は解けてくれますので省略してます。
③butter(バター)を角切りにして中火で完全に溶かします。

GMC step A
Place egg yolk and sugar in a large bowl. Mix egg yolk and sugar over the double boiler with a balloon whisk. Melt butter over medium-low heat completely. Gradually pour the melted butter into the egg yolk mixture and fold it with a spatula .

④butterをegg yolk mixtureに少しずつ加えてスパチュラで十分に混ぜます。
⑤cake flour(薄力粉)をmesh strainer(篩)にかけて混ぜ込みます。均等に混ざる様数回に分けて十分にfoldします。この時塩も一緒に混ぜます。
⑥少し温かい牛乳を少しずつ加えながら均等に混ぜます。仕上がりはプリンの生地同様にliquid状です。いわば、”水分を飛ばして濃縮する前のカスタードクリーム”といった印象です。

生地の混ぜ方
Sieve cake flour through a mesh strainer over the batter, and fold it until well incorporated. Then pour warm milk gradually into the batter with folding continuously. it’s just like a custard cream, pre-vaporized and unconcentrated.

⑦metal bowlに卵白を入れて、meringue(メレンゲ)を立てます。白ワインビネガーを注いで電動ホイッパーで泡だてします。soft peakに達したところで砂糖を加えます。stiff peak formまで泡立てします。適切なstiff peakの見極めはボウルをひっくり返してもびくともしない状態にある事で確認します。
⑧メレンゲを仕上げた生地に注ぎます。フラワーホイッパーで大きなメレンゲの塊がないくらいにラフに混ぜます。この時、バニラオイルを加えて好みの香りをつけます。

meringue mixture
Place egg whites into a metal bowl and add a few drops of white wine vinegar. Electric-whisk until it gets to the soft peak form. Then gradually adding sugar Iin two batches, continue whisking until the stiff peak form. When the meringue reaches the stiff peak form, it dose not move even if flipping the metal bowl down. Preheat the oven up to 150C. Then dump the meringue into the batter, and whisk roughly with a balloon whipper. The surface of the batter looks like Antarctic Sea. Pour the batter into the grill pan. Oven-bake at 150C for 45 to 60 minutes.

⑨グリルパンに注いで150度で約50分くらい焼き上げます(このボリュームで湯煎だと1時間以上)。焼きすぎると2層目のカスタードがフランと区別困難になって2層構造になります。長串をさして最下層に弾性があり中間層がカスタードとして串についてくる時相で焼き止めする必要があります。焼き時間は単なる目安にしかなりませんので頻回確認が重要なポイントとなります(これを湯煎で何回もチェックしていると火傷のリスクに曝されますのでグリルパンに置き換えています)。

⑩取り出して常温で1時間位冷ました後、ひっくり返すか、横から少しずつスライドしてグリルパンから取り出しできます。3時間以上冷蔵庫で冷やすとケーキカットした際にガスタードクリームが流れ出る事なく綺麗に切れます。

左下図は、確認しながら55分焼き上げたもので厚いカスタードクリーム層が得られています。期待通りの仕上がりになっています。中央は62分焼き上げたもので3層構造にはなっていますがカスタード層が薄くなっています。この様に焼き時間によりカスタード層の厚さが変わりますので45分焼いたあたりから油断は禁物です。また、右図の様に仕上げに表面にアプリコットジャムを塗ってみるのも良いかなと思いました。

ガトーマジック焼き時間による変化
(left) optimally baked. (center) over-baked. (right) apricot jam coated.